
Tips for Successful Event Sound Checks: The Foundation

Red Hot Revolution: Incredible Live Event Band
There’s not much you can do for an event that has been ruined by a poor sound check. And yet, a successful sound check will not save you from substandard sound and an underwhelming party unless you hire a high caliber live band such as Red Hot Revolution or Modern Retrospect. What separates the professionals from the amateurs in a performance is nearly always what happens before to the audience even arrives.

Modern Retrospect Band for Corporate Events, Wedding Receptions, Private Parties
Consider a sound check a system to be run correctly and not just an item to be ticked off a list. A sound engineer needs to go through the signal chain in the proper order and verify each component – the instrument output, the FOH mixing console or the monitor wedge at the vocalist’s feet. Don’t make the mistake of omitting a step; the problems you’ll have to deal with later are cumulative and harder to solve.
We’re going to walk you through the important phases of the process, two in particular that are often left out: running a hybrid or virtual event with your audience divided between the room and a live stream, and the management of digital mixer scenes for quick recalls.
On the Importance of Etiquette
How venue staff, crew and performers conduct themselves in the pre-show setup is governed by professional norms we call sound check etiquette. A lack of it’ll erode audio quality, cost time and put a strain on relationships. The engineer will be hard pressed to set the gain structure on a channel if some musicians decide to play at full volume. To get an accurate reading on any source, it has to be done one channel at a time.
A Matter of Psychology
In a way the sound check is a psychological exercise. There’s nothing like a chaotic or hurried session to put anxiety into a performer that’ll carry over to the show. A methodical approach gives them confidence in their monitor mix and they’ll be better for it before the audience is even there.
Stage Plot and Input Lists: Organization and Preparation
Long before a microphone is in hand, the sound check is either won or lost on preparation. It’s a waste of the one thing nobody has enough of, time, when a band or organizer shows up unprepared and the engineer has to put together the signal chain as he goes along.
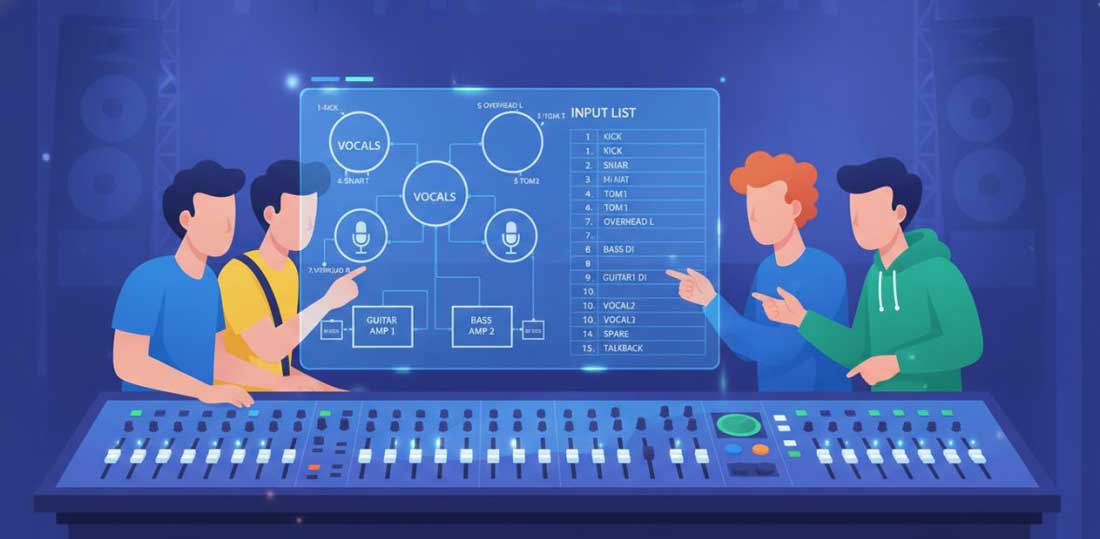
Sound engineer and band members reviewing printed stage plot paperwork together at a mixing console surrounded by cables and equipment in a dimly lit event venue.
Your Stage Plot
Think of the stage plot as a visual representation of where every amplifier, monitor, instrument and performer will be on the stage. With a good one the production team at the venue can stay ahead of any acoustic issues and have equipment and cabling in place. Be sure to note the exact positions of all backline and monitor wedges (and which mix they’re assigned), power needs and any obstructions to sight lines. Hand in a thorough stage plot 48 hours ahead of time and you’ll be sparing yourself technical errors and a long setup on the day of the event.
A Thorough Input List
Also known as a patch list, this is how the FOH (Front of House) engineers and the venue will pre-build their console scenes. Each audio source to be connected to the console is documented here with its channel number, type of mic or DI box, phantom power and so forth. Without an input list, the line check turns into a game of discovery.
Checklist for Live Events
To remove any guesswork, a sound check checklist provides a reference for the whole production team to work from as they confirm the signal chain.
Equipment Verification
Most technical failures on show day can be traced back to not doing a proper audit of the gear before anyone is ever on stage.
Pre-sound check verification:
- Run all XLR cables to ensure continuity and shielding are in order
- At the console, check that phantom power is on and DI boxes are powered
- Microphone stands should be put in position as per the stage plot
- Make sure monitor wedges are in place and tied to the right auxiliary outputs
- IEM packs need to be charged and scanned for any interference
- Reset the faders on the mixing console to unity
- Have the patch list loaded and in agreement with the input list
- Take stock of the room for any resonance
- Put in place any feedback suppression tools called for by the frequency response
Protocol for On-Stage Testing
With the equipment verified, proceed in this manner: start with the drums, move to bass and guitars, then keys and finally vocals. In this way the low end is put in place and the rest of the instruments are balanced to it. A line check is done to make sure there’s signal, followed by a gain check. Only once you’ve vouched for each source individually does the band come in for a blend check.
Gain Structure and the Signal Chain
This is where a sound engineer will either have great results or end up with distortion and noise for the duration of the show.
Proper Gain Staging
The job is to optimize the signal-to-noise ratio across the board, aka gain staging. Have the performer put in his loudest performance, not what he might put in for a sound check; too many hold back and the engineer will compensate with excessive gain. On a digital console the meter should be peaking in the region of -18 to -12 dBFS, well above the noise floor but with headroom for dynamics.
Microphones and DI Boxes
These require individual attention. A dynamic microphone should be checked for any damage and the XLR connection made secure. As for condensers, make certain the +48V phantom power is active at the console before making the connection. One should not overlook DI boxes. A passive model will put a load on high-impedance sources such as an acoustic guitar, and for an active box you need a battery or phantom power. It’s wise to test them under load prior to the show to forestall any impedance mismatch.
Time Management: How Long is a Sound Check?
With some advance preparation and depending on the size of the band and the production, a sound check can run anywhere from 30 minutes up to two hours. A four-piece band that has a stage plot and input list in order can have a complete check done in 45 minutes.
Buffer in some extra time. When you’re allotted 60 minutes by the venue but require 90, there’s no choice but to be hasty with monitor mixes; this is the source of most complaints on show day.
Streamlining the Process
There’s no better way to save time than to come in with a digital mixer scene already built. Modern consoles let the engineer put away and bring back full channel set-ups, routing, EQs and compressor parameters in short order. If you have a scene on file from a prior engagement at the venue, gain staging that would have taken half an hour is done in less than 10 minutes.
Dealing with Monitor Mixes and the Audio Engineer
The audio feeds going to the stage so the performers can hear are called monitor mixes. For a performance to be in-tune and tight they’re a necessity.
Setting Up Your Mixes
Put the vocalist first. Find out what the lead singer needs to make out, normally their voice and the kick for timing. You’ll see the same mix configurations again and again: the vocalist with lead vocal, keys, bass and kick; the drummer with click track, bass, kick and lead vocal; and so on for the bassist and guitarist. In-ear monitors give you isolation and quality a wedge cannot match, though they take more to set up and a wireless frequency scan all their own.
Communication
A working partnership exists between the band and the FOH engineer. Be specific in your requests to give the engineer a direction and location, say “the kick is too loud in my IEM” or “I want more lead in the floor wedge on the left of the stage.” Performers who speak in technical terms rather than subjective ones have the most productive sound checks.
When Things Go Wrong
Don’t make random adjustments, it’s a waste of time and will only create more problems; be systematic about troubleshooting.
Frequency and Feedback
That high-pitched squeal that causes you to plug you ears is feedback, the mic picking up its own signal from the speaker. Turn down the gain on the channel for an instant remedy. To be sure of it, put a narrow cut on the offending frequency with a graphic EQ. An open mic with a wedge pointed right at it, too much gain on a vocal, or room resonance are the usual culprits.
Latency
Every stage of processing in a digital system adds latency. Over 25 milliseconds and it’s noticeable to the performer and will affect timing. Should they say the sound is “disconnected” or “late,” check the latency.
Backline
Delays have nothing to do with the PA when the backline is the problem. Instrument and amp checks should be done before the formal sound check even gets underway. Have each band member make sure his or her gear is in order, from tuning to batteries in an active pickup. Most of the technical failures onstage during a show are instrument level issues that were not put right in the pre-show soundcheck.
Tools of the Trade
You need the proper equipment to keep a soundcheck on schedule instead of turning it into a troubleshooting session.
XLRs and Cables
Any live rig is built on XLR cables. A pro kit will have 6, 15 and 25 foot lengths, a tester, gaffer tape, adapters for when connectors don’t agree and spare DI boxes of both types. You should have an extra XLR for every important channel; a cable failure on the lead vocal or kick during the show is totally avoidable.
Measurement
An RTA or measurement mic puts the room’s frequency response in front of the engineer so they can spot trouble before it becomes feedback. An SPL meter is just as useful for adhering to the venue’s volume rules.
Hybrid and Virtual Events
Add a remote audience to the live one via live stream and you have a hybrid event with complications the standard setup doesn’t cover. The FOH mix for the room will not suit the stream. Put a dedicated output on the console for the broadcast encoder, which is separate from the main PA, so the streaming engineer can set levels for headphones and speakers. A check of the stream mix should also be in the schedule, and you’ll need to make sure the broadcast destination is receiving the audio before you start.
In the end, sound production is what makes or breaks a live event. The exclusive live event bands offered by Green Light Bands apply professional production values to all events, whether it’s a corporate function or a luxury celebrity wedding reception. Our bands cover everything from Top 40 to jazz to country to Motown and classic rock. Get in touch with us to find the perfect wedding band or an incredible, high energy corporate party band for your special occasion.
FAQ
What is the proper procedure for a soundcheck?
First run through your input list and make sure all XLR cables and their connections are in order. Go over the microphones and DI boxes one at a time, put in place the gain structure on the mixing console and the monitor mixes for the performers, then do a line check with the whole band. By being methodical you can be certain that nothing in your signal chain will give you trouble in the form of feedback or latency when the performance is underway.
What’s the time required for an average event’s sound check?
You can expect 30 to 60 minutes for most events, though it’s a matter of how complex things are. A no frills setup of 4 or 5 inputs will have you done in less than 30 minutes. Put aside 45-90 minutes, possibly longer, for a full band where there’s FOH reinforcement and in-ear monitors to contend with. With hybrid or virtual events you’ll want to allow more time to test the digital signal paths and any latency. If the venue is new to you, factor in some leeway for troubleshooting potential issues.
How do you deal with common problems?
Excessive gain or the positioning of a monitor wedge are what tends to produce feedback loops; correct it by turning down the gain and moving the monitors further from the mics. Should you encounter latency with a digital system, look at the console settings and your signal chain. As for a poor frequency response, that’s often an EQ error or the room itself, so make use of the EQ on the console. And since XLR cable issues are not uncommon, test them and have spares on hand. More than anything, communication between the sound engineer and the performers is where things can go wrong, so have headsets and agree on a few hand signals.
What tools and equipment should you have on hand?
There are a few things you should always have: spare XLRs of different lengths, phantom power adapters for condensers, an SPL meter and an app for frequency analysis. Make sure you have DI boxes and whatever monitor system is called for, wedges or in-ears. A patch list of the signal chain is indispensable. Digital mixers need scene files that are tested and backed up. An event specific checklist will cut down on the time spent setting up, while also seeing to it that you don’t overlook anything.