

A Complete Guide to Coordinating Your Band’s Sound Check
There’s no substitute for knowing how to coordinate a band sound check if you want to deliver a good live show. All too often a band will waste 45 minutes or more trying to fix a basic signal flow and then be left wondering why the mix is so muddy during the performance. At Green Light Bands we’ve seen it all, having worked with hundreds of live bands at everything from weddings, celebrity parties, and corporate events to fairs, festivals and private celebrations.

Red Hot Revolution: Incredible Live Event Performance Band
The difference between a lackluster production and a tight, professional show is all about the preparation. You can see this in the work of world-class, seasoned bands like Red Hot Revolution and Liquid Blue; they’ve performed more than their fir share of sound checks and consistently deliver quality music regardless of the event size or type.

Liquid Blue Performing in the Dominican Republic
Why it’s important to coordinate sound checks properly
Proper sound checks are what causes on-stage disasters to be avoided and makes better use of everyone’s time. If your band walks in with a stage plot and input list, the engineer can immediately get to work rather than having to make assumptions about your sound equipment and setup. Stage volume can cause feedback if not managed correctly, or let the drums drown out the vocals, which is quite common with inexperienced sound engineers. Do things right and those tpes of issues won’t happen.
What you need before you get to the venue
Have clear and understandable documents ready to go. A 90-minute process can be cut in half if you bring a thorough stage plot, an input list that covers every mic and channel, contact details for the musical director and a list of any special needs such as DI boxes or in-ear monitors (IEMs).
Stage Plot and Input List: Pre-Gig Essentials
This is where the work actually begins. These two items are the foundation of any efficient sound engineering job. Giving copies to the FOH engineer (Front of House engineer) before equipment load-in is like providing a roadmap instead of forcing them to improvise.
Creating a usable stage plot
Think of the stage plot as a bird’s-eye view of the physical layout of your stage. It just a single page with a scale (1 inch to 2 feet is sufficient) so the engineer can gauge distances. Use simple shapes and clear labels for the position of the drum components – including hi-hat and kick mics – the stage location of lead guitar and bass amplifiers, keyboard, monitor wedges and mic stands. Also remember to mark any wireless or IEM (in-ear-monitor) packs.
An input list for the sound engineer
This list will tell the sound engineer exactly what’s going into each channel of the mixing console. Make note of the cable type, whether it’s an XLR or a DI box, and any phantom power or wireless frequency requirements. This will keep the engineer from guessing and save 10 or 15 minutes of time.
Getting information to the venue
Email the stage plot and input list to the manager of the venue, as well as the sound engineer, a week or so ahead of the gig. Also add a note for them to let you know if the layout raises any questions, concerns, or needs any type of adjustment.
Working with a Live Sound Engineer
How well the band sound check is coordinated is largely a dependent on your relationship with the FOH engineer. Show some respect for their expertise and keep your expectations in check.
Initial contact and expectations
Make contact three to five days before the event to confirm they have your paperwork and ask about any potential venue limitations. Be very upfront: “We’ll be in at 4pm for load in and need 45 minutes for a full sound check, after which we’ll run a song.” It’s a way of giving the sound engineer a timeline they can work with.
If you’re the opening act, know the time. Thirty to forty-five minutes is a typical amount. Ask the engineer what’s the most productive use of that time and let them take the lead on the sound check.
Discussing mix requests and monitor setup
When you discuss the mix requests with the sound engineer, be specific. Let them know if any lead vocalists require a heavy reverb or if the drums need to be pushed forward. As far as the monitors are concerned, find out if the drummer is using a click track or has other needs to hear properly. There’s also the question of whether backing vocalists require a prominent mix to hear themselves.
For in-ear monitors (IEMs), it’s worth having a conversation about how many mixes the band will need. Most venues will supply 4 to 6 independent monitor mixes as a rule of thumb. You can expect each lead vocalist to have a mix of their own. Drums and bass might be combined, and backing vocals will typically share a mix.
Arrive at least 15 minutes before your scheduled sound check time with equipment all set up and ready to plug in. Don’t spend your sound check time adjusting drum height or tuning guitars. Limit the sound check to one full song that best showcases your dynamics. When sound check is over, thank the engineer and then step off stage promptly.
Band Sound Check Order: Load-In Through Line Check
The order of operations for coordinating a band sound check, from load-in to line check, is designed to be straightforward and avoid any confusion.
Load-in and setup
Allow 15 to 20 minutes for the setup, though a larger band will possibly need much more time. First things first: the drum kit is placed first along with the overhead, tom, snare and kick mics. Next is to set up the guitar and bass amps, keyboard, mic stands and monitor wedges. The engineer will be running XLRs from the mics to the board as you work. If you stray from your documented setup, let the sound engineer know right away.
Gain staging and signal flow
With everything in position, the engineer has 10-15 minutes to do what’s essential: set the input level on each channel so the signal is good without clipping. Put in 10 or 15 seconds at full performance volume to give them an idea of what to expect. Part of the process is verifying the signal flow. The sound engineer will make sure the right signal is going where it should be. Any problems are better found now than in the middle of a performance.
Line check and full band sound check
The line check comes first. Each instrument is tested individually by the engineer to confirm its gain and flow. This is non-negotiable and runs 20-25 minutes. Then the whole band plays together for a complete song, giving the engineer a chance to balance the overall mix to hear how the instruments sound together. It’ll usually take about 15-20 minutes for the line check. In all, plan for a total of about 45 minutes unless the band is large.
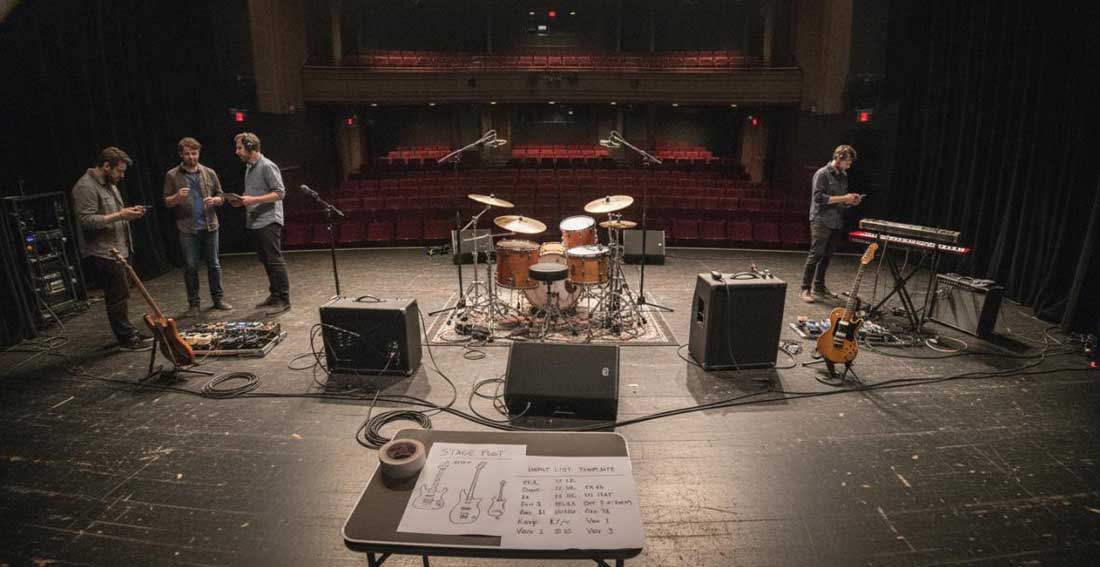
Band members getting ready for a full sound check with drums, lead guitar, bass guitar, keyboard, and microphones.
Timelines and Venue Size
The amount of time you spend on sound checking is determined by your preparation and the room itself. At a small venue of 300 capacity or less, 30-45 minutes is pretty typical. A mid-size room (300-1,000 people) will take around 45 to 90 minutes on average. For anything over 1,000 capacity, allow 90-180 minutes to get the fine-tuning done. These times are only accurate if the band is prepared; otherwise add a good 15-30 minutes more.
Efficiency and IEMs
To be most efficient with your time, have things set up before the official start. During the line check, you’ll want to play at full volume. When the engineer wants to make an adjustment, wait for him to finish before starting up again.
As for the monitor mix, remember, it’s a separate being and not what the audience hears. With IEMs (in ear monitors), every member has their own wireless pack and earpiece. The monitor engineer will test these out in 5-10 minutes to make sure everyone can be heard. It helps to state your preferences beforehand – “I want to lock in the pocket, so give me mostly drums and bass” – and the sound engineer will construct the mix to suit your needs.
Preventing feedback and managing wedges
A monitor wedge is a floor speaker on stage that’s pointed toward the performer. Most professional bands these days use in-ear-monitors, but some bands still go with the older wedges. Get the placement and gain staging right and you’ll avoid feedback, a piercing squeal that can create havoc with a performance. Feedback is an infinite loop of sound from the wedge going into a mic and being amplified. The way to stop it is with directional mics that are less prone to picking up sound from behind or off to the side, and by keeping wedges at a distance from vocal mics and not cranking the levels any louder than necessary. If you hear it, let the engineer know so they can drop the level or tweak the frequency.
Diagnosing signal chain problems when coordinating a band sound check
You can be as prepared as possible, but issues can still cause problems during sound check. Being able to troubleshoot these issues is what keeps things on track.
Most venues these days have digital consoles (Yamaha CL, PreSonus StudioLive, Behringer X32). They’re more flexible and allow for recall. On the other hand, an analog board has a simpler flow but without recall. When you’re done with a digital console, have the engineer save your mix as a snapshot.
Some of the usual problems and how to handle them:
Problem: No signal on a channel.
Inspect the XLR at the mic and the console and swap in another cable. If there’s still nothing, check the phantom power.
Problem: Feedback while checking in.
Back the mic off the monitor or turn the wedge down. The engineer can also sort out the offending frequency with EQ if necessary.
Problem: A musician can’t make themselves heard.
Make sure the wedge is in the right spot and the volume is up. For IEMs, check the wireless pack and battery.
Problem: Lead vocal getting lost among the instruments.
Have the engineer nudge it up. If it’s still buried they may have to add some high-end presence to help it cut through.
Then there are the sound check myths that need to be discussed. Inexperienced sound engineers may think the mix needs to be identical to what the audience hears. It won’t be. The room is empty during a sound check, but once the crowd is in the room they’ll absorb the high frequencies and change the acoustics. The engineer will need do a remix for the performance. And don’t think you have to go through the whole setlist in a sound check. One song is enough to dial in the band’s dynamic range.
Making your routine work
There’s a difference between live bands that sound exceptional and bands that are a bit chaotic. It almost always comes down to preparation. With an input list, a stage plot and good communication with the professional sound engineer, what might be a 90-minute ordeal becomes a 45-minute process that gets better results. We at Green Light Bands have seen it time and again at festivals, fairs, weddings, private parties, and corporate events. The top live bands across weddings and corporate events come in with clear documentation and treat the sound check as a collaboration. The sound engineer wants you to succeed, so give them the chance to do their job by respecting their time and expertise.
FAQ Coordinating Sound Checks
What’s the proper order with a band sound check?
Normally you’ll load in the equipment and set it up first. Then the sound engineer will do gain staging on every channel. A line check follows, which tests each instrument separately through FOH before the full band comes in to balance the stage volume and work on monitor mixes. A short run-through at the end is all that’s required to confirm everything is in order before the guests come in. This is the best way to ensure clean signal flow and that the musicians can be heard.
How long should a band sound check take?
The length of a sound check is determined by the venue and the band in question. You can expect to sound check 30-60 minutes for a typical session, though a small room with an uncomplicated setup might be completed in 20 or 30 minutes. On the other hand, if you’re in a larger space running IEMs and several monitor mixes, plan on 60-90 minutes, maybe longer. Opening act bands will usually be allotted 15-20 minutes. That means much of this comes down to preparation; a well-prepared input list and stage plot before load-in will save considerable time.
How do you communicate with a sound engineer during a sound check?
Communication with the sound engineer is the key to keeping things efficient. It’s best to make your needs known in advance. When the time comes for the actual check, have one person, say the musical director, be the point of contact so there’s no confusion. Be precise in what you ask for: “more kick drum in the left side monitor”’ is better than a vague request for “more drums.” The same goes for specifying phantom power for condensers or DI box requirements. A little patience and respect for the engineer’s expertise will keep things running smoothly and prevent any feedback issues.
What should be included in a stage plot and input list?
A stage plot lays out where everyone and everything is positioned on stage, from the players to the power drops and wedges. Your input list needs to be equally clear, explaining channel assignments on the desk, XLR lengths, microphone types and instrument names, as well as any special effects such as reverb. Give these documents to the venue a week or two ahead of the gig. That way the sound engineer has what he needs to set up the channels properly before you even get there.
What are some common mistakes that occur during a band’s sound check?
Some of the more frequent errors are bands turning up late without their stage plots, or poor gain staging leading to distortion. There’s also the issue of not testing cables or doing a proper line check, and opening act bands that try to rush their check. An understanding of signal flow and gain structure is necessary to avoid such pitfalls.
How do IEM systems change the sound check process?
IEM systems add a layer of complexity to the process of sound checking, but IEMs are what’s most popular with bands today. Unlike traditional monitor wedges, each musician may want a custom mix on his own in-ear device, which the engineer has to dial in while checking wireless pack batteries and frequencies for any interference. Digital consoles handle IEMs better than analog, but it still takes time. Have each member do a quick line check of his mix before the whole band starts in.
What is the difference between a line check and a full band sound check?
The line check is when the engineer goes through each mic and instrument one by one at FOH to verify connections, gain and phantom power, and usually takes 10-20 minutes. Once the line check is completed, the full band sound check can begin. Here the band plays together for another 20-40 minutes while the engineer balances the EQ and fine-tunes the stage volume. Both are non-negotiable for a professional-sounding show.